


5 iPhone Vacation (or Staycation) Photo Tips
The old adage of “the best camera to have, is the one you have with you” holds true when traveling. We all have smartphones and we aren’t afraid of using them when it comes to capturing the moment. The only problem is, sometimes the images look pretty awful. Blurred faces, weird colors, and under or over-exposed pictures are better than nothing. But still, why not make the most of the situation? Behold, the list of iPhone Photo Basics. It’s easier than you might think to create a great photo, even on-the-go.
1. Release the shutter. Also known as, take the shot or capture the image. There is more than one way to tap the shutter button and it may not include any tapping.
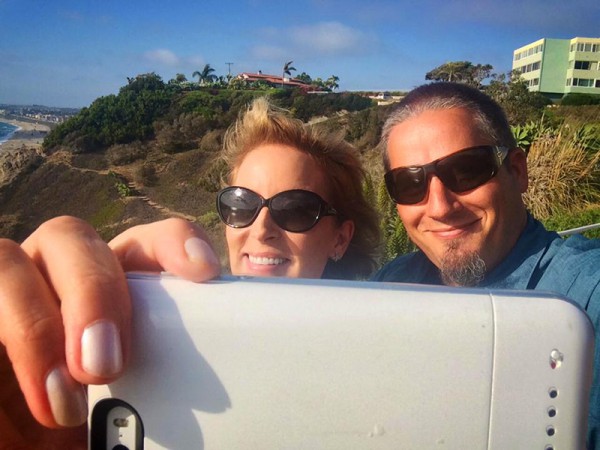
Press a Volume Button (either one), located on the side of your iPhone, to take the shot. This comes in very handy when you’re taking a selfie. You don’t need to reach across the scene to tap that shutter button. My techniques is to hold the phone in the landscape (horizontal) position with your right hand and press one of the volume buttons to take the shot (as seen in this photo with my friend, Glynn Lavender, of Creative Photo Workshops.)
Try the self-timer. Since iOS 9 the Camera App has included a self-timer option. Just tap the time icon on the LCD screen and choose 3 seconds or 10 seconds, depending on your situation. I like to use 3 seconds for selfies and 10 seconds for group shots. Just tap the shutter, move the camera in position (hand-held, selfie stick, or tripod), and the timer counts down 3-2-1, then takes the shot. If you’d like more detailed info about the self timer, check out this post on the OSX Daily website.
![]()
Hook up your headset. Yes, that’s right. Your iPhone earbuds can be used as a shutter release. Make sure they’re plugged into the iPhone, open the Camera App, compose your shot, and click the button on your headset to take the shot. This is also a very stealthy way to capture candid photos.
![]()
Use a bluetooth remote shutter release. Available everywhere and ranging in price from a few dollars to around $20.00 US. You do have to “pair” the shutter release with your iPhone by turning on the remote and putting it in “search” mode. First, tap on your Settings app. Next, tap Bluetooth. Your iPhone will locate your remote and pair it. The active range is approximately 30-90 ft or 10 to 30 meters.
![]()
2. Control the Exposure. In the old days, you could adjust exposure and focus in the Camera App just by tapping on the iPhone screen. Now you have more control over the exposure with manual adjustment. Just tap and swipe up or down anywhere on the screen – UP to make the image brighter or DOWN to make it darker. As you swipe up or down you’ll see the sun icon move on the slider. It’s that easy! Tap on a different area of the screen if you want to begin again. See more detailed information about this feature on iPhone Photography School.
![]()
3. Work the Light. I bet you’ve heard the expression, “photography is all about the light.” It’s especially true when using a smartphone. Whether you’re taking a selfie, or having a photo taken of you – find the light and look in that direction. It really can make the difference between a terrible shot or a lovely rendition of your best self. This photo was captured by my friend, Bruce Paquette, while having cocktails on board Crystal Cruises. I found my light!

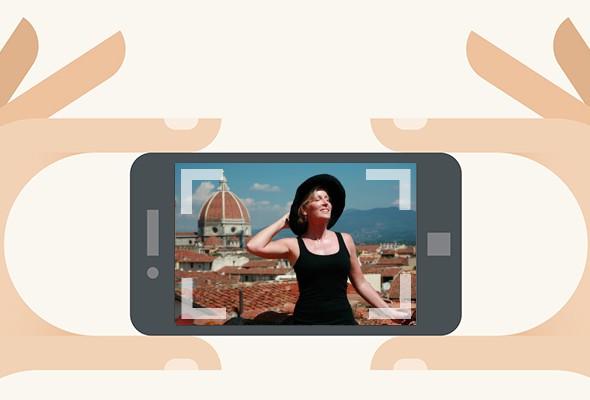
4. Watch your angles. Camera position makes a difference when capturing photos of anything, especially people. Every time you compose an image, think about all the possible angles. Shoot from down below, from the side, from behind, and for attractive people shots, shoot from above the eye line. This eliminates any chin or neck wiggle and generally makes people look a bit thinner.
Here’s my DON’T example for capturing selfies.

And here’s my DO example for capturing selfies. Look towards the light and position your camera at or above eye-level for a more attractive photo. Thanks to the Digital Divas of Precision Camera.

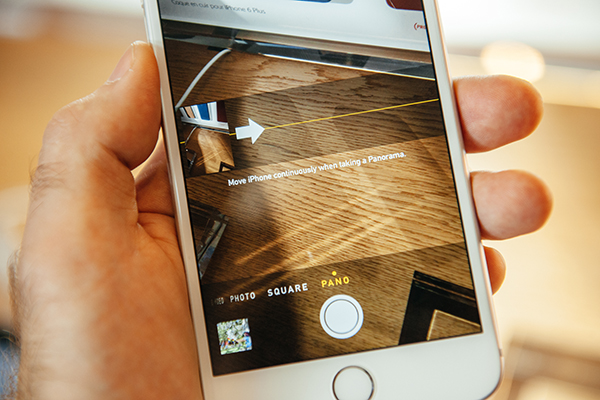
5. Try the PANO feature. It’s a loooong picture! Commonly known as Panoramic, wide format, or an elongated field of view – you can achieve this look by using PANO. Open the iPhone Camera App, swipe to the left until you see the PANO option at the bottom right. You’ll see a bar running across the display with an arrow and a picture-in-picture-type display next to the arrow. Tap on the shutter button to begin the process of taking a panoramic photo. Slowly pan your phone in the arrow’s direction to capture the scene. If you’d rather pan your phone in the opposite direction, just tap on the arrow to have it switch sides. The Camera App does put a limit on how far you can pan. You can either pan all the way (until it stops), or end it at any point by tapping again on the shutter button to complete the capture.
Check out my Pano of the Ancient Theater in Taormina, Italy.

There are so many possibilities for capturing great shots with your iPhone. Now it’s your turn to get out there and create some amazing images!